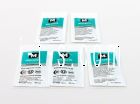
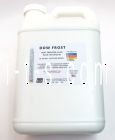
Epoxy, 2-Part, 1/2 Pint Kit for Turcite
Epoxy, 2-Part, 1/2 Pint Kit for Turcite.
Use with Fadal VMC4020 or smaller Turcite Kits.
SEE INSTRUCTIONS BELOW FOR BONDING OF POLYMERS AND COMPOSITE WITH CE211 ADHESIVE.
REQUIRED MATERIAL
Polymer/Composite – Cut to required size
CE211 Two Part Bonding System
3 Mixing Sticks (One for Part A, One for Part B, One for COMBINED MIX)
16T Spatula (Comes withCE211 Kit)
60-80 Grit Emery Cloth or Grinding Disc
Isopropyl Alcohol
Lint free cleaning rags
Clamps or Weights for slides and wear plates
PREPARING THE METAL SUBSTRATE
Pre-clean the metal surfaces using isopropyl alcohol
Abrade surface to a minimum 75Ra to maximum 175Ra finish (mill, abrasive paper or grind)
Shot blasting can also be used to prepare the metal slide if above finish can be attained
TIP: Use 100psi oil free air pressure with 36 grit aluminum oxide for best results
Clean surfaces once again with isopropyl alcohol and clean, lint free cloths
TIP: Final wipe down should be IMMEDIATELY BEFORE BONDING. Both the metal bonding surface and the polymer should be cleaned. DO NOT TOUCH EITHER SURFACE WITH BARE HANDS AFTER CLEANING. Wear latex or plastic gloves for protection
TIP: If the parts and hardware are going to be sitting for more than a few minutes before bonding, be sure to cover them with clean rags to prevent moisture or other debris to form.
PREPARE THE POLYMER/COMPOSITE
Cut materials to the proper size for the application
Clean the material with isopropyl alcohol and protect it from any contamination
PREPARE CE211 ADHESIVE
Mix Part A and Part B separately using stir sticks. DO NOT USE THE SAME STICK IN BOTH PARTS OR IT WILL CONTAMINATE THE BATCH.
Parts are to be mixed together at a 1:1 ratio by weight or volume in a separate container with a clean stir stick. MIX TIME SHOULD BE A MINIMUM OF 5 MINUTES TO INSURE THE PROPER DISTRIBUTION OF GLASS LEVELING BEADS IN THE ADHESIVE
TIP: CE211 is available in Dual Pak applicator guns to insure accurate mixing. Contact Tri-Star for more information.
Pot life of CE211 is approximately 40 minutes after mixing. Be sure to only
mix the amount of adhesive you can use in this time period. Full cure of CE211 is
24 hour but rigid gelling takes place within 8 hours.
TIP: Do not mix adhesive in temperatures below 50°F (10°C)
TIP: When humidity is above 60% extra care needs to be taken to avoid water droplets form developing on bonding surfaces. Use of heat lamps in over the surface can help as does a small fan. The fan will keep airflow moving above the bonding area and will prevent settlement of moisture.
CLAMP/PRESS THE POLYMER/COMPOSITE IN PLACE
Using clamps or weights, secure the sheet or tape in position on the slide. 10-15psi load is all that is necessary. DO NOT DISTURB THE BONDED Material FOR AT LEAST 2 hours.
CE211 is set at 8 hours with full cure at 24 hours.
MACHINE THE MATERIAL AFTER PRESS AND CURE
Once the 5 hour cure of the CE211 is complete you can turn, mill, grind, scrape the material to finished condition.
TIP: DO NOT MACHINE OIL GROOVES MORE THAN 50% OF THE THICKNESS OF THE SHEET OR PLATE MATERIAL. FAILURE TO DO SO COULD LEAD TO BOND LINE FAILURES WHERE THE METAL SUBSTRATE IS EXPOSED.
TIP: OIL GROOVES SHOULD HAVE SMOOTH RADII FOR PROPER OIL FLOW
FINAL CLEANUP - After machining and scraping is completed, check oil grooves for any adhesive or other residue. Remove using an Exacta knife or similar small bladed instrument.
Wipe down all surfaces with isopropyl alcohol to be sure all surface are free of defects.
TROUBLESHOOTING PROBLEMS - 99% of the problems utilizing CE211 on bearing materials can be tracked to cleanliness issues or improper mixing of the adhesive. If the above instructions are followed closely, you should have no bond failures and will enjoy years of outstanding performance. There are some things to look for when you do experience a bond failure.
1. If the material tears away from the metal uniformly:
a: Look at which side most of the adhesive is still sticking to. If it is primarily on the polymer: the substrate was either not rough enough or the adhesive was improperly mixed.
b: If the adhesive is on the metal and the adhesive has broken away in random areas from the polymer: there was a cleaning issue with the polymer.
2. If the polymer tears away from the metal slide our housing with random adhesive spots left behind on the metal and the polymer: there was some form of contamination. If there are rust colored spots on the slide or polymer: moisture was on the surface before the adhesive was applied. If there are spots of white residue on either surface: there was oil or grease on the surface before bonding.
3. To remove cured adhesive for rebonding use a hot air gun to crystallize the old adhesive and scrap it off with appropriate too.


